- Регистрация
- 17 Февраль 2018
- Сообщения
- 38 911
- Лучшие ответы
- 0
- Реакции
- 0
- Баллы
- 2 093
Offline
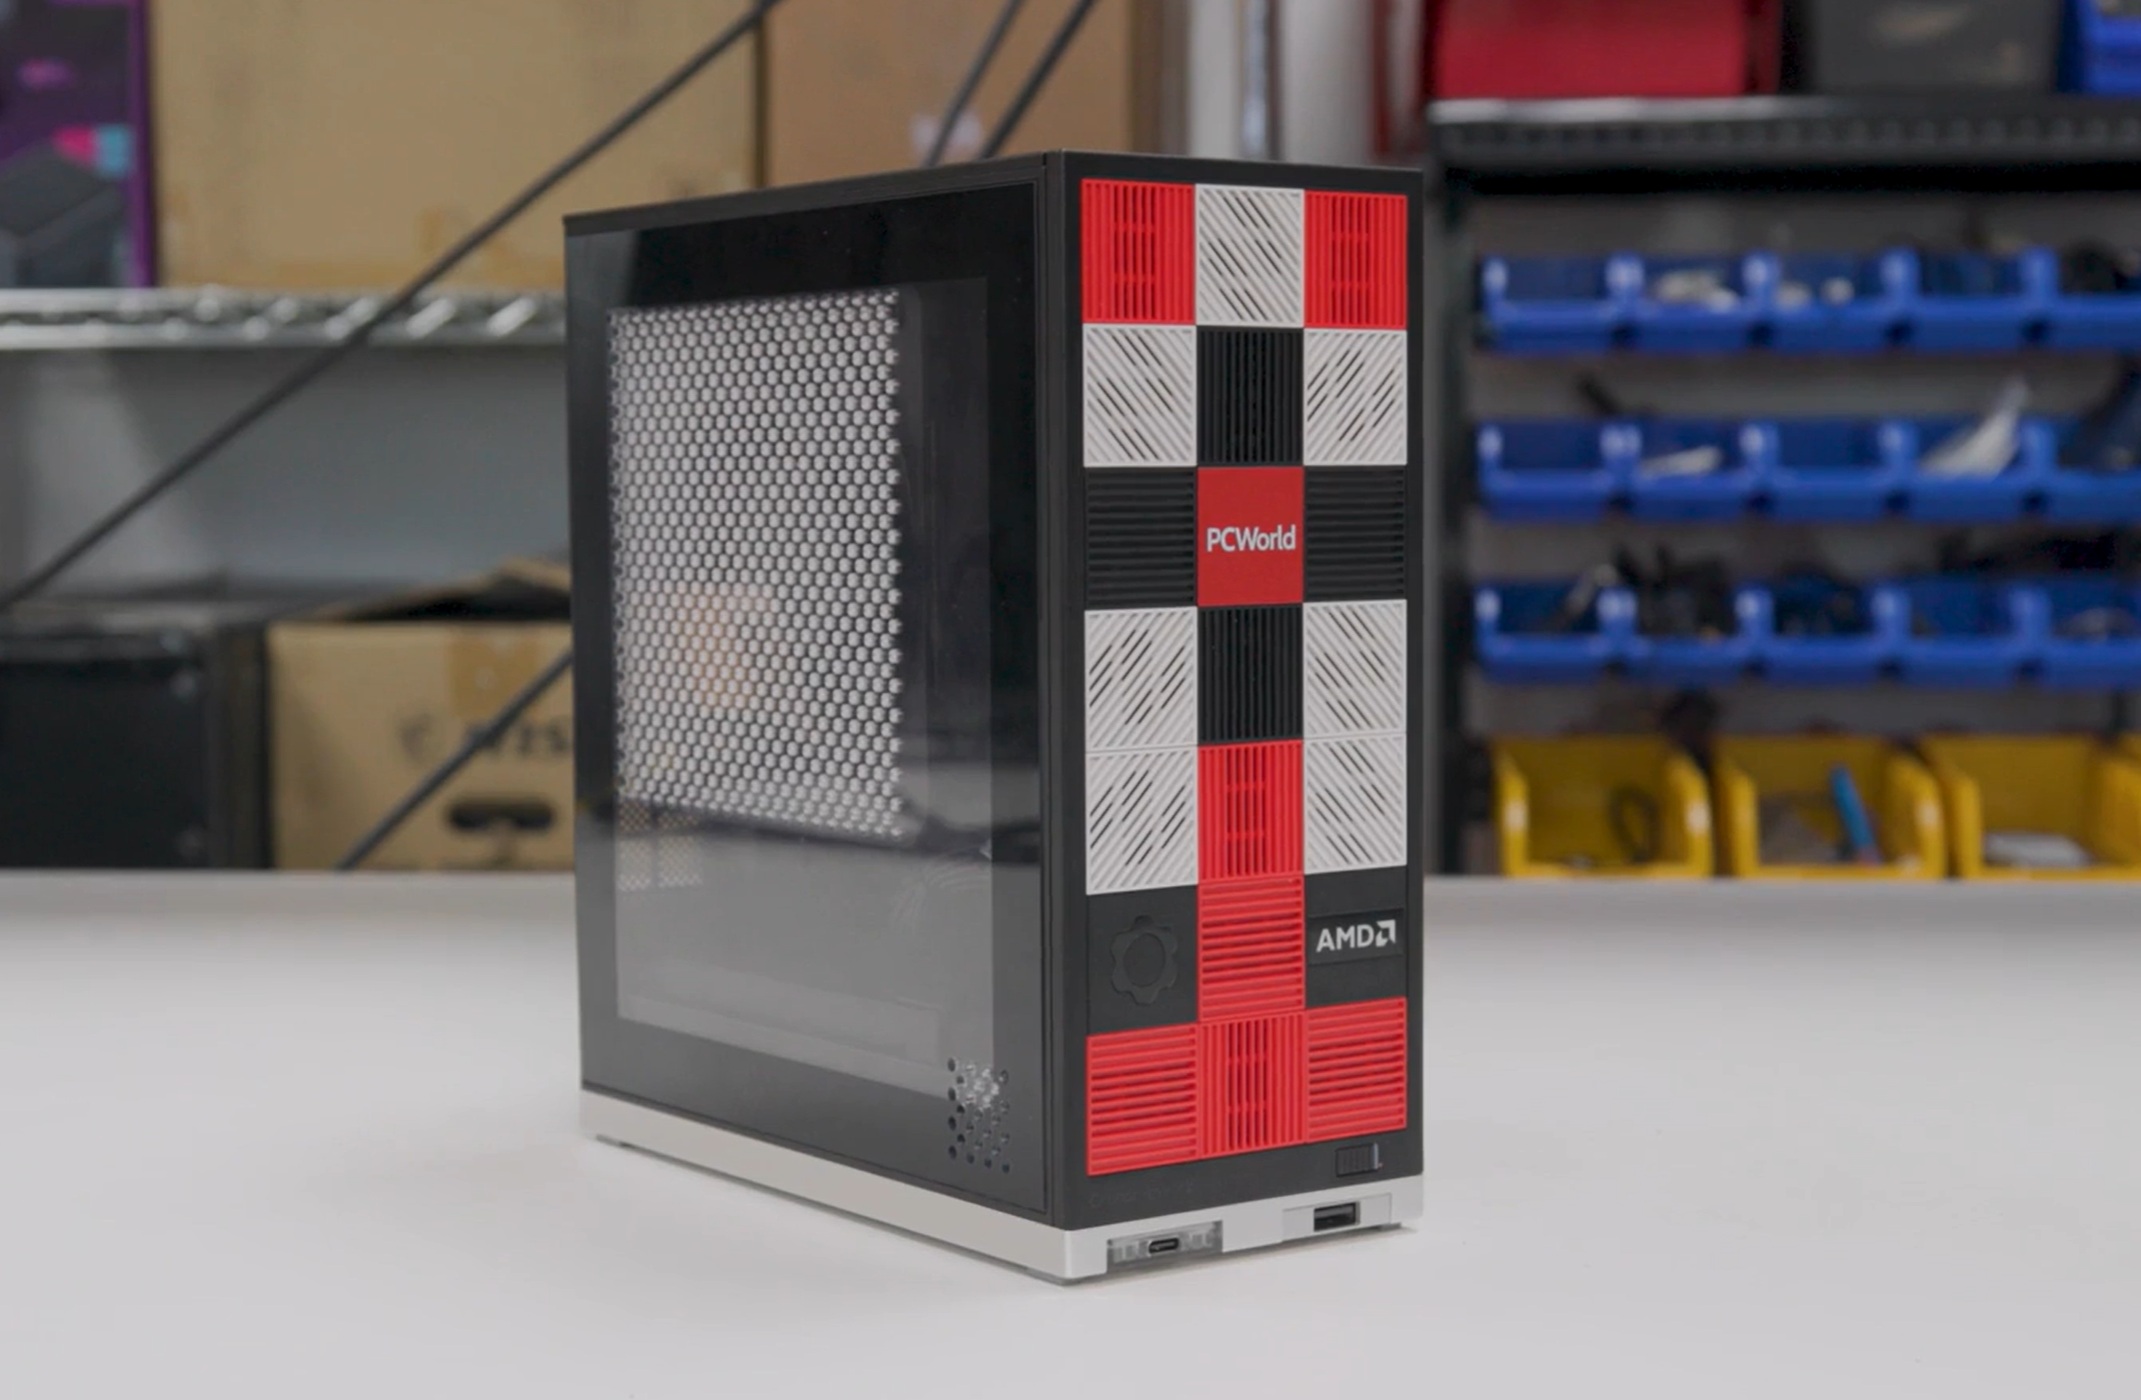
Do you need multiple photos of how to turn a thumbscrew? That's the level of care we're talking about with the Framework Desktop.

Image: Alex Esteves / Foundry
This may come as a surprise: Though I work at PCWorld, I don’t build computers.
Well, I can. I have. But it’s one thing to buy a few thousand dollars’ worth of parts and then build a desktop on a budget that’s not my own, versus plonking down several hundred precious dollars and messing around inside of a desktop when I have several perfectly good laptops very nearby and might screw it all up. Plus my wife says that I have to run to Costco.
Enter the Framework Desktop. If you have the time, money, and desire, you can build a desktop PC from scratch! It’s fun and rewarding. For the suburban parent who will happily change their wiper blades but not their oil, the Framework Desktop offers configurability for little effort. Building an Ikea bookshelf is complicated compared to this.
Framework has sold multiple generations of its laptops, all with the same goal in mind: offer the flexibility of a desktop, but inside a laptop form factor. But a desktop poses a different challenge: How do you keep up with a desktop that is already configurable almost down to the screws? Here, I would say that Framework dodged the question. But that’s kind of immaterial, since the result is a highly detailed, simplified process of putting together a desktop PC.
The easiest Desktop you'll ever build
Framework Desktop
Price When Reviewed: $2515
Best Prices Today: $2515 at Framework
The Framework Desktop ships in either a pre-built or DIY Edition. I reviewed the latter, and you’ll see more photos and a performance evaluation in a separate article. This story focuses just on the build process, to show you what it’s like to put it together. And it doesn’t get easier than this.
Building the Framework Desktop: Out of the box
I remain convinced that two opposing forces are always pulling on my psyche: my father’s German ancestry, which finds a deep satisfaction in engineering and then executing the proper solution; and my mother’s Irish roots, which simply asks the question, Does it work? If the answer is yes, then it’s off to the pub. Framework satisfies both.
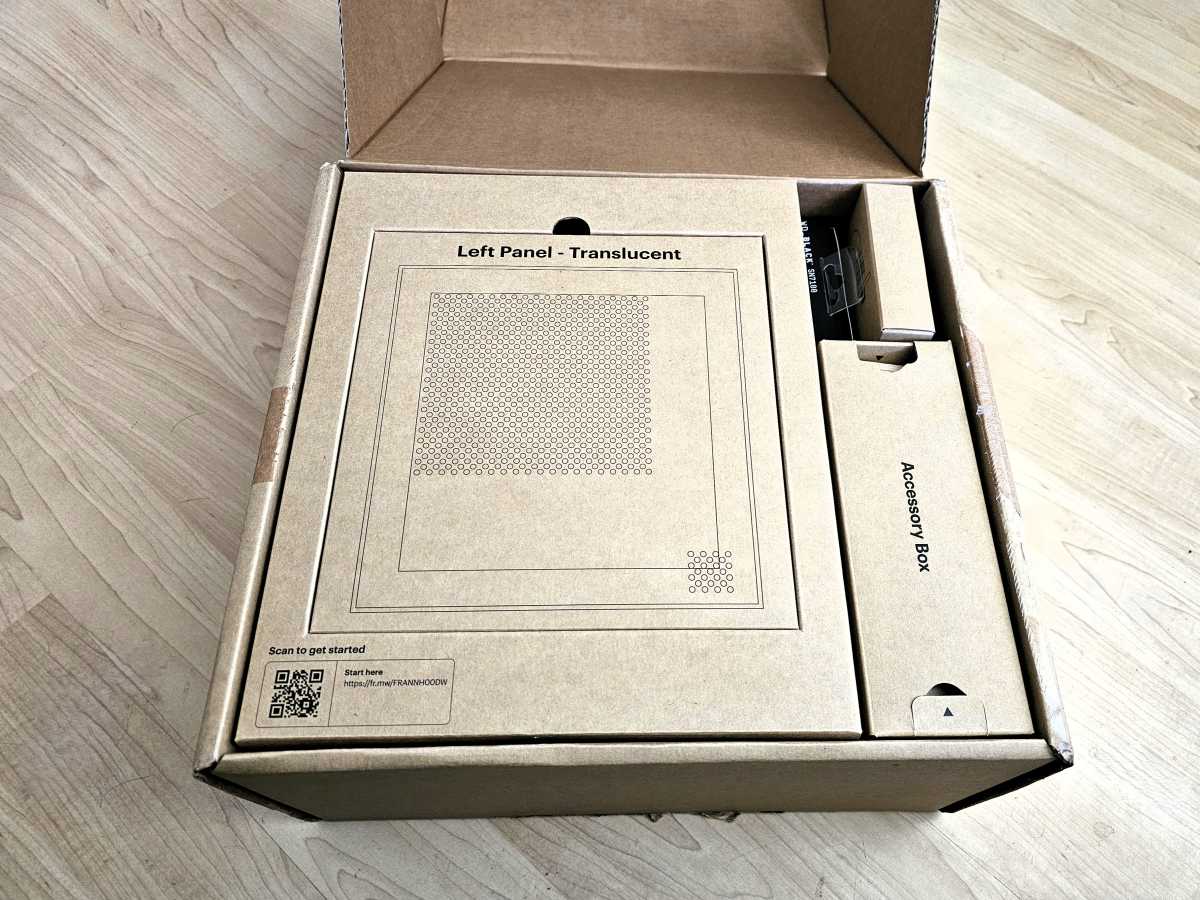
The Framework Desktop is all packed together, with each part encased in a labeled, cardboard box. Note the scannable HTML glyph that links to the manual.
Mark Hachman / Foundry
For one, Framework has the most well-documented manual I can recall seeing. And that’s weird, because the DIY Edition requires hardly any effort. There’s so little “D” in the “I,” I almost wanted more. Even Framework says that putting it all together should take about 45 minutes. That seems insanely long. I took about 30, not only because I was worried I’d make a mistake but also because I have the manual dexterity of a golden retriever.
Essentially, the DIY Edition is a flat-packed PC. All of it ships inside a box, inside which are more boxes: the case, the CPU fan, the side panel, colored tiles, an SSD (assuming you ordered one), the power cable, and that’s about it. Ikea provides an Allen wrench; Framework gives you a long two-headed, reversible screwdriver with a Torx and a Phillips head.
On one of the boxes is a link to the manual, which you can leave open on your phone or tablet. (You can follow along what I did, here.)
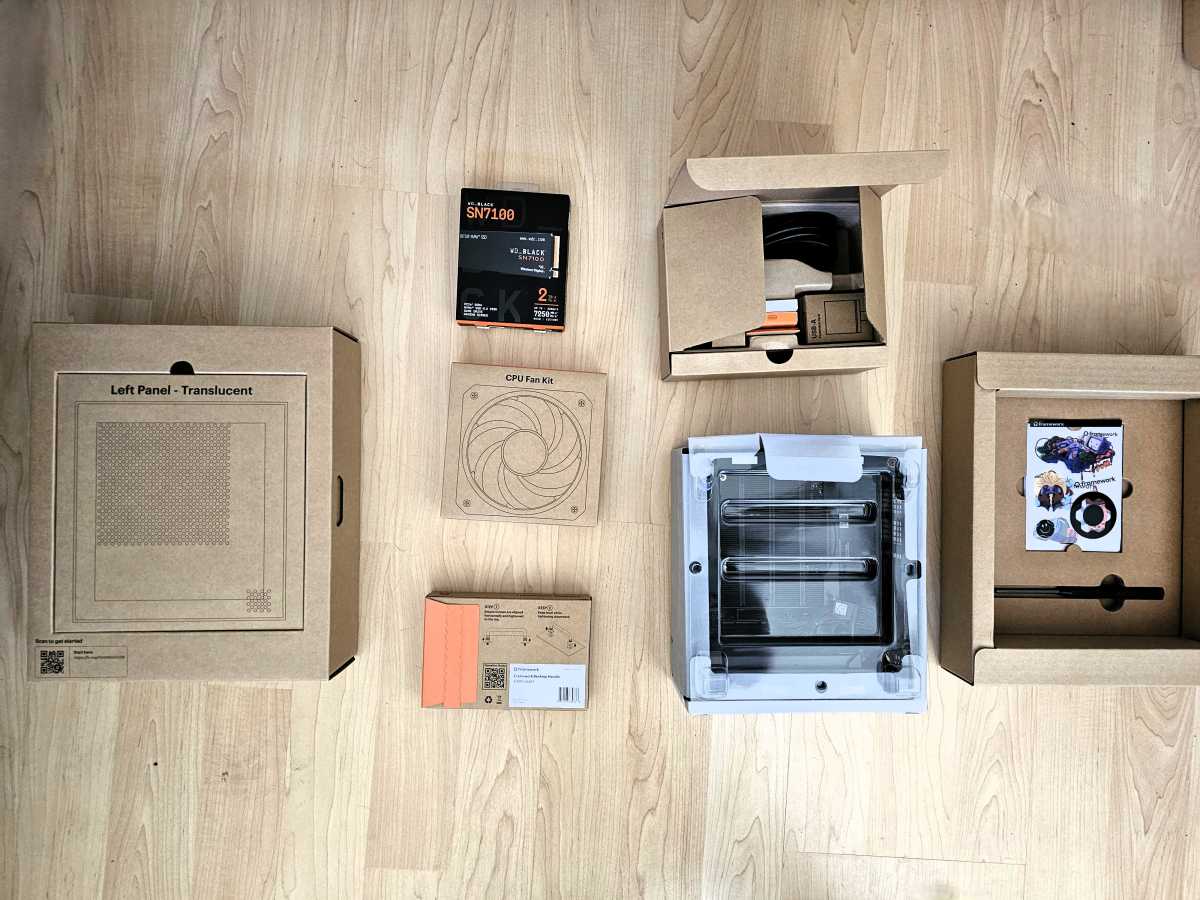
There really aren’t that many parts. Framework even included a prototype handle (center, bottom) which I didn’t use.
Mark Hachman / Foundry
Each step is almost excessively documented, with multiple photos describing each of the 45 steps. But wait: Framework devotes four steps simply to unscrewing each of the two thumbscrews on the top of the Desktop and removing the top panel. Building a “normal” desktop involves buying a CPU, applying and spreading thermal paste, affixing a cooler of some sort, and more. There’s none of that here. Not only is the CPU already affixed to the motherboard, but Framework pre-installs the motherboard and memory, which comes soldered down.
Really, the entirety of the building process involves screwing on the 120mm CPU fan with four screws, plugging it in, inserting the SSD and replacing the heat spreader…and that’s it. The remainder is simply opening up the case, closing it, and installing Windows. That actually takes the most time, as Microsoft downloads updates that can take a while to install. (Framework doesn’t supply an SSD with Windows pre-installed, though it will sell you a Windows license to install yourself — there’s another, well-documented guide to do so.)
Virtually all of the hardware also comes with little visual cues: an arrow pointing to the proper position, plus actual “Top” and “Bottom” labels etched into the plastic or metal itself. That’s not necessary, but so very reassuring if you’re uncertain about what you’re doing.

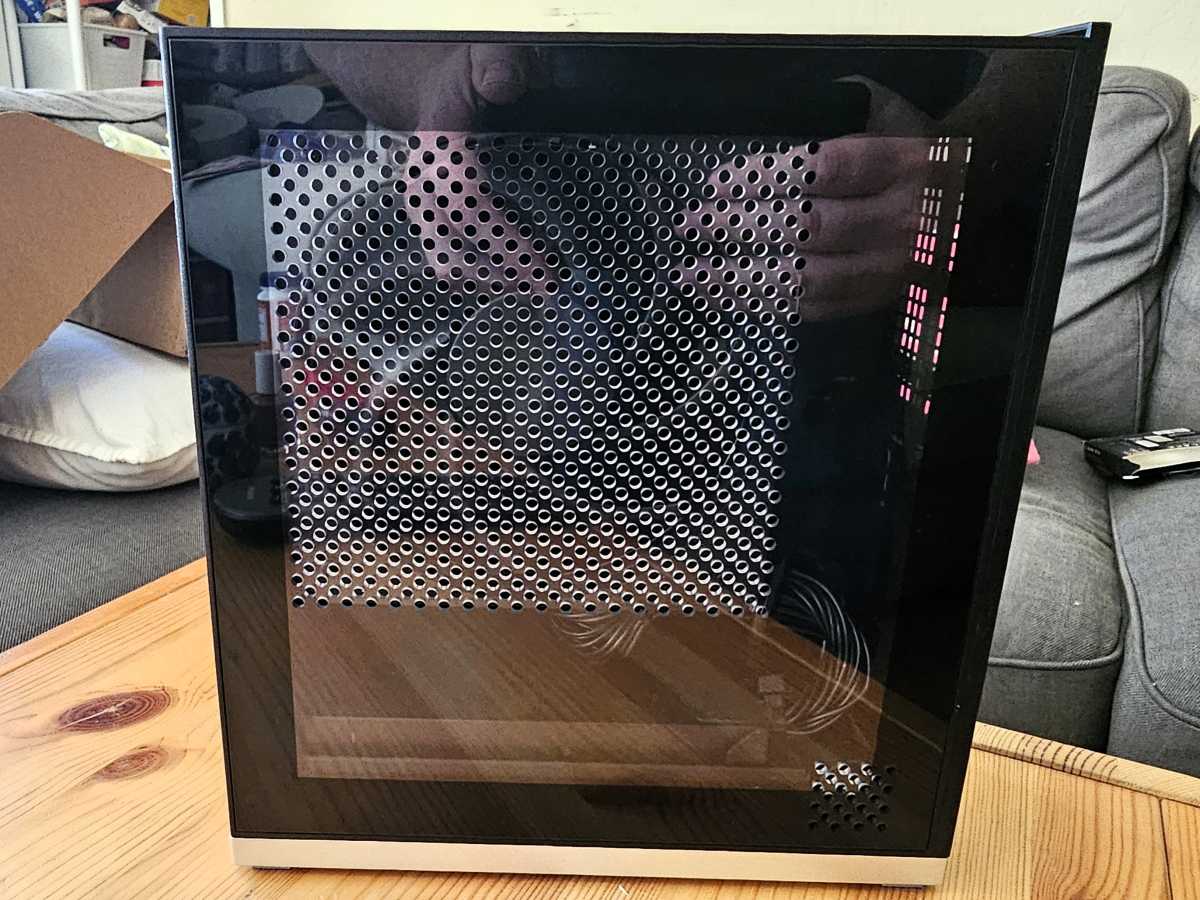
Framework ships most of the Desktop pre-assembled. This is right out of the box, with cables tried and the CPU radiator already mounted.
Mark Hachman / Foundry
Finally, don’t forget the USB-C expansion cards that plug into the chassis base, or the tiles that allow you to customize the front to your own aesthetic. I’ve never been a fan of laptop stickers, but the tiles (with small vents for airflow) are something I didn’t think I’d appreciate as much as I do.
Building the Framework Desktop: What I didn’t like
Not everything’s perfect. If I were building a PC, I’d prefer to install the SSD into the motherboard, and then the motherboard into the case. Framework asks you to do the opposite. What that means is that you’ll need to unscrew the heat spreader, allowing it to pop up, then insert the SSD, all by poking and prodding at the M.2 slot, way at the bottom of the inside of the case.
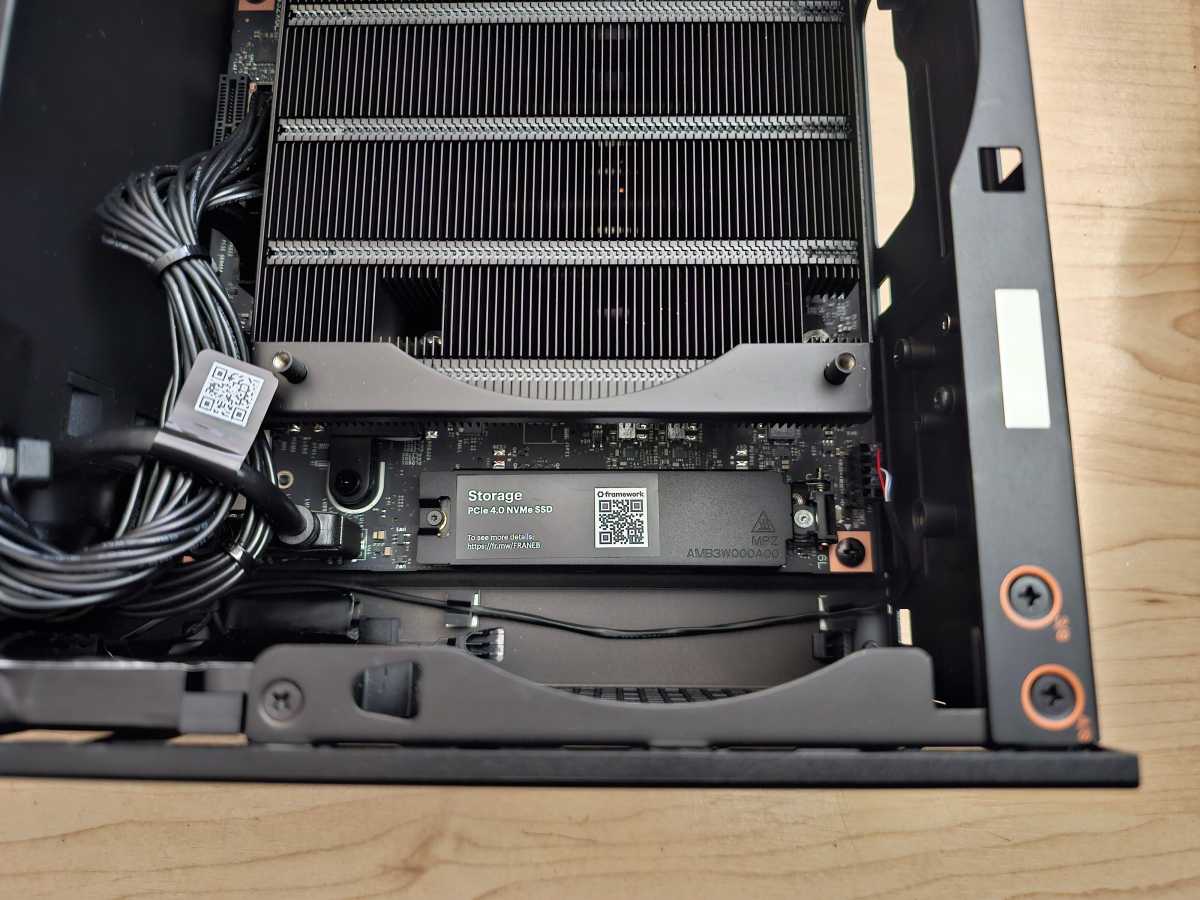
I’d prefer to connect the SSD first, then place the motherboard inside the case. That’s not an option with the Framework Desktop.
Mark Hachman / Foundry
That led to a minute or two of chasing the tiny Torx screw around the case after it popped out of the heat spreader and rolled around, until I fished it out with a tweezers. Framework’s screwdriver is very slightly magnetic, enough that it can barely hold the screw in place while I lowered it into the case. I was very much reminded of playing Operation while trying to line everything up.
(Framework also solders down the memory, so that you can’t install, replace, or upgrade it.)
Framework’s Desktop also includes an optional secondary slot for additional storage on the back of the motherboard, accessible via its own side panel. That panel, like the plastic panels you see here in my photos can be removed easily just by pulling them slightly out and upwards.
Framework gives you a choice between an optional translucent plastic side panel or one that matches the black aluminum used on the rest of the chassis.
Mark Hachman / Foundry
I also wasn’t totally pleased by how the top panel clips on to the case. On one try, it would clip in easily; on another, it would simply refuse to line up properly for a few minutes. Thankfully, we cut that portion from our associated YouTube video, where I’ll give you another look at what’s inside the case and how the Desktop performs overall.
Aside from a few moments of feeling like an idiot, I had no issues putting the Framework Desktop together, and I doubt you will, either. The handholding this company is willing to do should make you feel like you’re well taken care of.
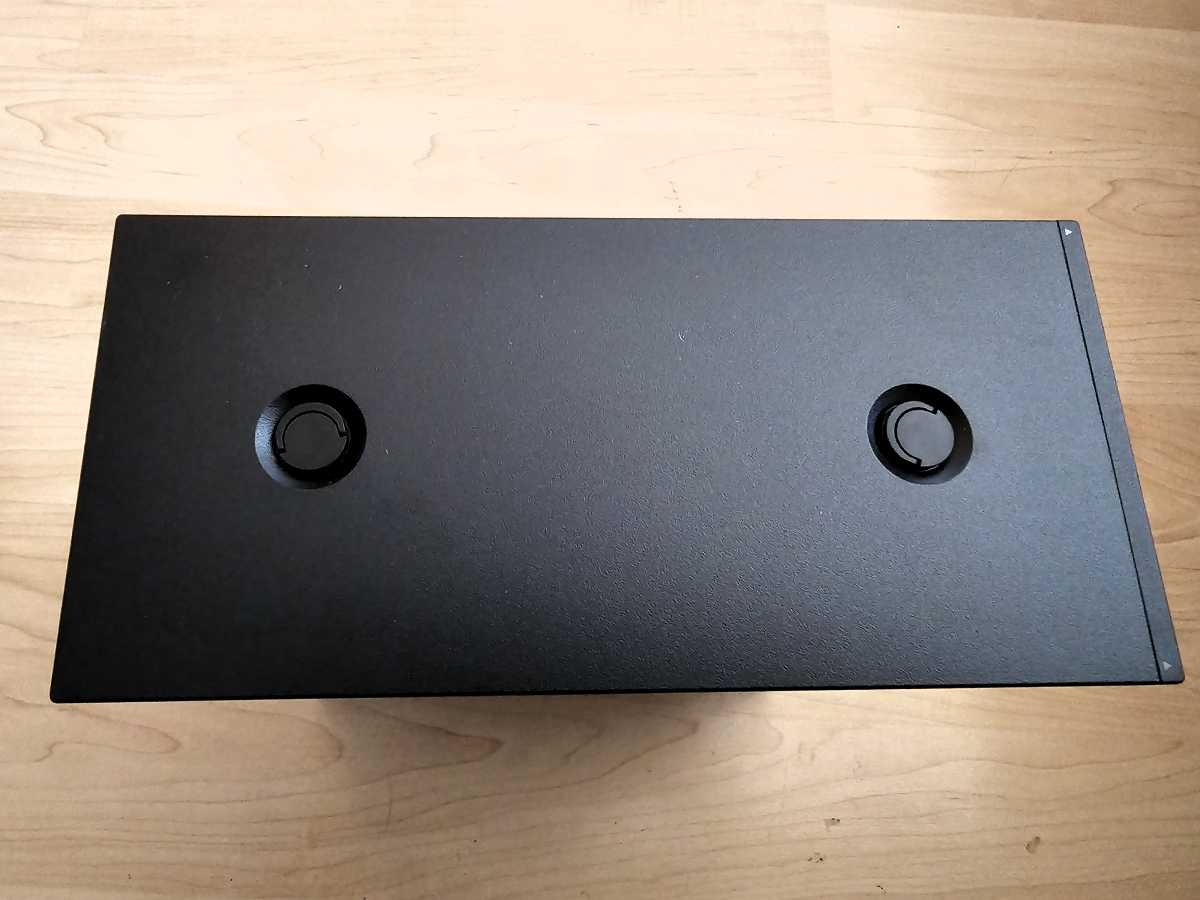
The thumbscrews on the top of the Framework Desktop must be unscrewed for access to the side panels and the interior. The holes didn’t match up easily with the screw holes in the chassis, one of the few times I felt a little frustrated. Note the small but visible arrows to help you align the panels correctly.
Mark Hachman / Foundry
The other challenge to be aware of is the software drivers. If you purchase a Windows license, you’ll be asked to install it. Normally, a motherboard includes a set of pre-installed drivers or firmware to help facilitate that process; Framework’s desktop drivers had yet to be validated by AMD, which meant that I had to install a package of beta drivers alongside the Windows installation.
If for some reason those drivers aren’t available, it’s not that big of a deal. You can install Windows without needing to connect to the internet, then add the license key later. You can also do what I did, which was to discover that I had forgotten to install the Wi-Fi driver, so I simply connected an Ethernet cable instead and added the driver afterwards.
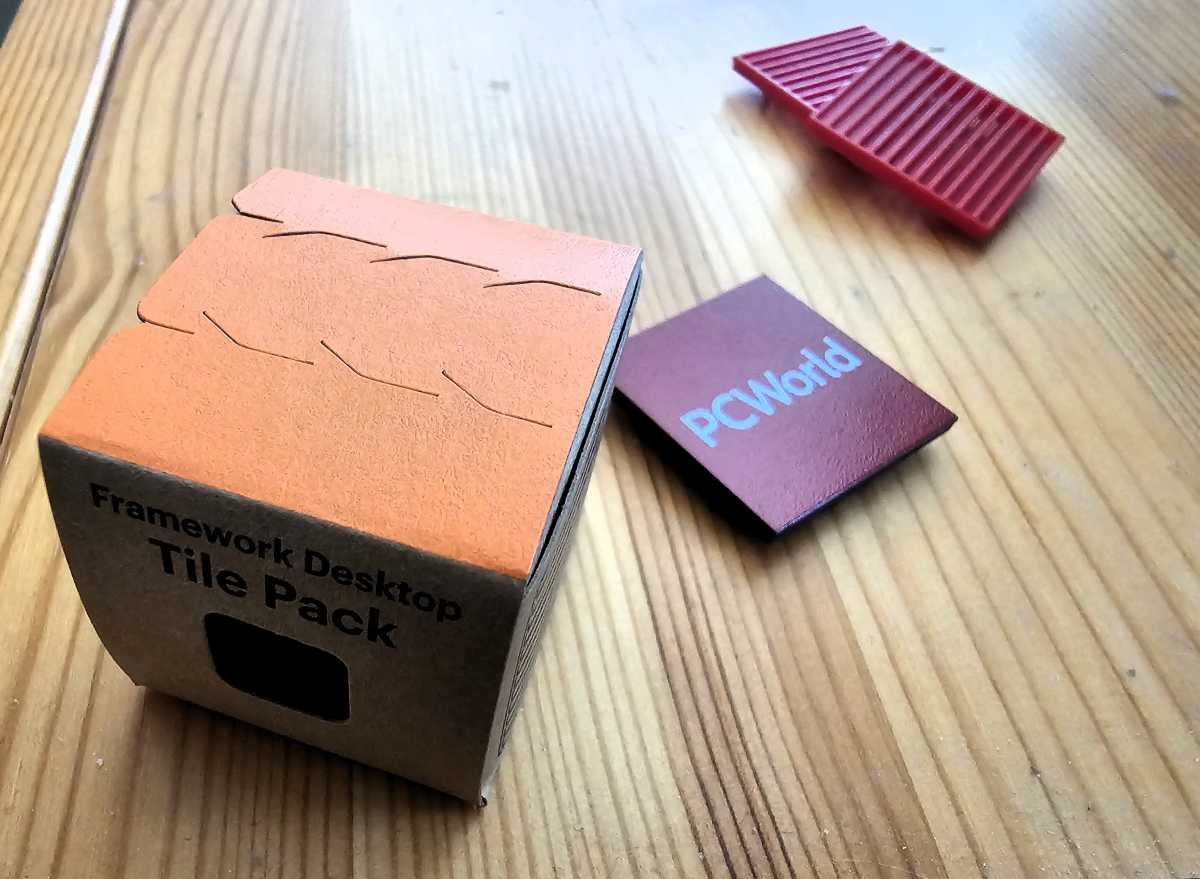
Don’t forget the tiles, which come in a variety of designs and colors.
Mark Hachman / Foundry
Everything worked perfectly, though AMD later provided an updated driver that really unlocked the processor’s performance potential. Given that Framework ships its products in batches — and those batches may take a few weeks to process — I’d expect those issues to be worked out well before you receive your finished Desktop.
Building the Framework Desktop: Looking ahead
One of the strengths of the Framework experience is that the company is looking forward to the day not when you buy a Framework device, but when you upgrade it. Though Framework hasn’t published a guide to upgrading the Desktop’s mainboard, it almost certainly eventually will. It already offers you a guide to removing the Desktop’s mainboard and installing it in another mini-ITX case, after all.
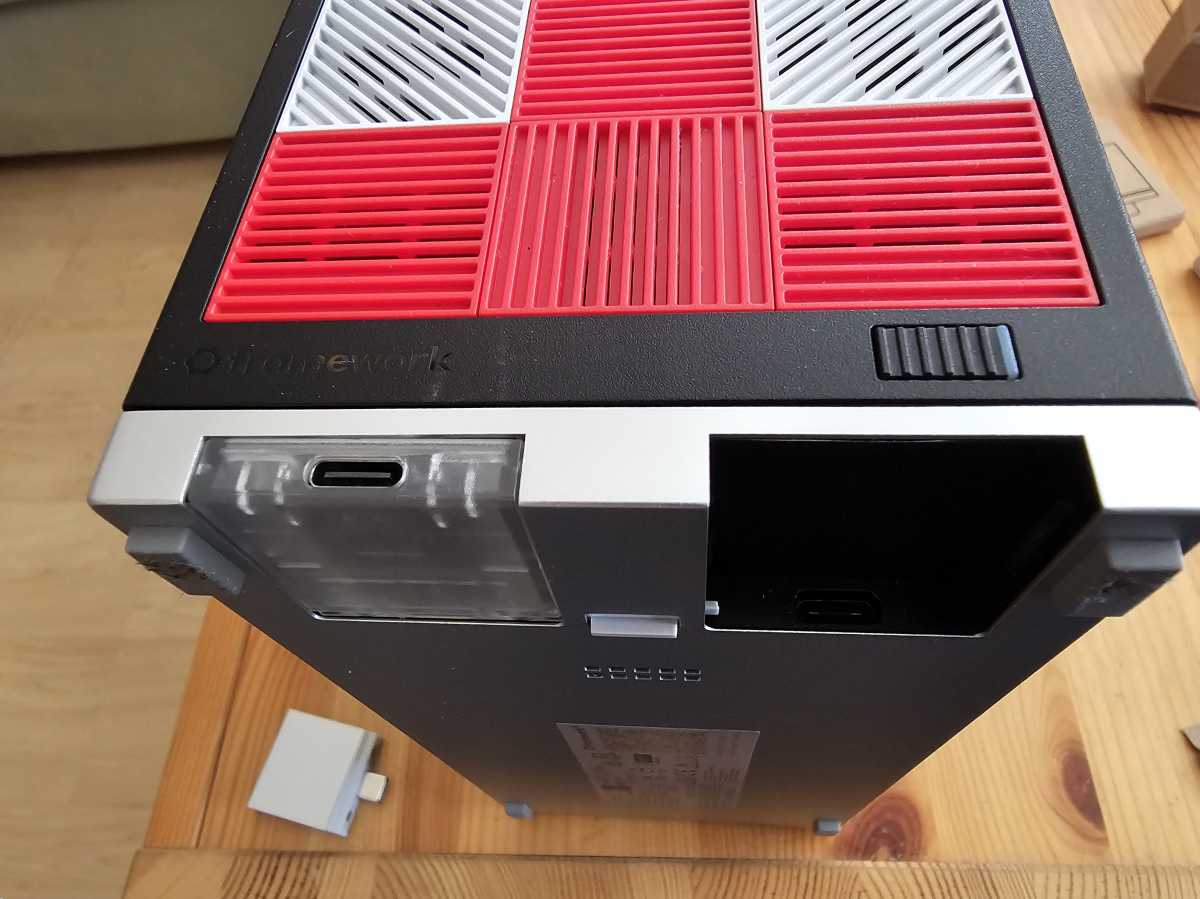
After inserting the tiles, you can slide in the I/O expansion cards, too. The gray latch on the underside of the chassis helps secure them.
Mark Hachman / Foundry
Eventually, AMD will manufacture a successor to the AMD Ryzen AI Max+ processor, and you may want to swap the existing “Strix Halo” processor out and replace it with AMD’s latest chip. And that’s the foundation of Framework’s platform: You may be able to pick and choose from future upgrades, but you’ll choose to remain within Framework’s framework.
There’s a lot to be said for that approach. We live in a world where so many companies are building in fine print and gotchas, service charges and subscriptions and labyrinthine contracts. Instead, Framework goes out of its way to be as simple and helpful as it can, and that’s something I can relate to.
I’ve reviewed many, many products over my years as a technology reporter, and I can’t think of a single one that goes to such lengths to document how to use it as much as Framework does. Framework’s Desktop gives off a vibe of “helpful nerds who enjoy explaining technology” — which is very much what I think PCWorld has always tried to achieve.
The point is that you don’t have to be a nerd to buy a Framework Desktop, however, and that’s one of its best features.
Author: Mark Hachman, Senior Editor, PCWorld

Mark has written for PCWorld for the last decade, with 30 years of experience covering technology. He has authored over 3,500 articles for PCWorld alone, covering PC microprocessors, peripherals, and Microsoft Windows, among other topics. Mark has written for publications including PC Magazine, Byte, eWEEK, Popular Science and Electronic Buyers' News, where he shared a Jesse H. Neal Award for breaking news. He recently handed over a collection of several dozen Thunderbolt docks and USB-C hubs because his office simply has no more room.
Recent stories by Mark Hachman:
Image: Alex Esteves / Foundry
This may come as a surprise: Though I work at PCWorld, I don’t build computers.
Well, I can. I have. But it’s one thing to buy a few thousand dollars’ worth of parts and then build a desktop on a budget that’s not my own, versus plonking down several hundred precious dollars and messing around inside of a desktop when I have several perfectly good laptops very nearby and might screw it all up. Plus my wife says that I have to run to Costco.
Enter the Framework Desktop. If you have the time, money, and desire, you can build a desktop PC from scratch! It’s fun and rewarding. For the suburban parent who will happily change their wiper blades but not their oil, the Framework Desktop offers configurability for little effort. Building an Ikea bookshelf is complicated compared to this.
Framework has sold multiple generations of its laptops, all with the same goal in mind: offer the flexibility of a desktop, but inside a laptop form factor. But a desktop poses a different challenge: How do you keep up with a desktop that is already configurable almost down to the screws? Here, I would say that Framework dodged the question. But that’s kind of immaterial, since the result is a highly detailed, simplified process of putting together a desktop PC.
The easiest Desktop you'll ever build
Framework Desktop
Price When Reviewed: $2515
Best Prices Today: $2515 at Framework
The Framework Desktop ships in either a pre-built or DIY Edition. I reviewed the latter, and you’ll see more photos and a performance evaluation in a separate article. This story focuses just on the build process, to show you what it’s like to put it together. And it doesn’t get easier than this.
Building the Framework Desktop: Out of the box
I remain convinced that two opposing forces are always pulling on my psyche: my father’s German ancestry, which finds a deep satisfaction in engineering and then executing the proper solution; and my mother’s Irish roots, which simply asks the question, Does it work? If the answer is yes, then it’s off to the pub. Framework satisfies both.
The Framework Desktop is all packed together, with each part encased in a labeled, cardboard box. Note the scannable HTML glyph that links to the manual.
Mark Hachman / Foundry
For one, Framework has the most well-documented manual I can recall seeing. And that’s weird, because the DIY Edition requires hardly any effort. There’s so little “D” in the “I,” I almost wanted more. Even Framework says that putting it all together should take about 45 minutes. That seems insanely long. I took about 30, not only because I was worried I’d make a mistake but also because I have the manual dexterity of a golden retriever.
Essentially, the DIY Edition is a flat-packed PC. All of it ships inside a box, inside which are more boxes: the case, the CPU fan, the side panel, colored tiles, an SSD (assuming you ordered one), the power cable, and that’s about it. Ikea provides an Allen wrench; Framework gives you a long two-headed, reversible screwdriver with a Torx and a Phillips head.
On one of the boxes is a link to the manual, which you can leave open on your phone or tablet. (You can follow along what I did, here.)
There really aren’t that many parts. Framework even included a prototype handle (center, bottom) which I didn’t use.
Mark Hachman / Foundry
Each step is almost excessively documented, with multiple photos describing each of the 45 steps. But wait: Framework devotes four steps simply to unscrewing each of the two thumbscrews on the top of the Desktop and removing the top panel. Building a “normal” desktop involves buying a CPU, applying and spreading thermal paste, affixing a cooler of some sort, and more. There’s none of that here. Not only is the CPU already affixed to the motherboard, but Framework pre-installs the motherboard and memory, which comes soldered down.
Really, the entirety of the building process involves screwing on the 120mm CPU fan with four screws, plugging it in, inserting the SSD and replacing the heat spreader…and that’s it. The remainder is simply opening up the case, closing it, and installing Windows. That actually takes the most time, as Microsoft downloads updates that can take a while to install. (Framework doesn’t supply an SSD with Windows pre-installed, though it will sell you a Windows license to install yourself — there’s another, well-documented guide to do so.)
Virtually all of the hardware also comes with little visual cues: an arrow pointing to the proper position, plus actual “Top” and “Bottom” labels etched into the plastic or metal itself. That’s not necessary, but so very reassuring if you’re uncertain about what you’re doing.
Framework ships most of the Desktop pre-assembled. This is right out of the box, with cables tried and the CPU radiator already mounted.
Mark Hachman / Foundry
Finally, don’t forget the USB-C expansion cards that plug into the chassis base, or the tiles that allow you to customize the front to your own aesthetic. I’ve never been a fan of laptop stickers, but the tiles (with small vents for airflow) are something I didn’t think I’d appreciate as much as I do.
Building the Framework Desktop: What I didn’t like
Not everything’s perfect. If I were building a PC, I’d prefer to install the SSD into the motherboard, and then the motherboard into the case. Framework asks you to do the opposite. What that means is that you’ll need to unscrew the heat spreader, allowing it to pop up, then insert the SSD, all by poking and prodding at the M.2 slot, way at the bottom of the inside of the case.
I’d prefer to connect the SSD first, then place the motherboard inside the case. That’s not an option with the Framework Desktop.
Mark Hachman / Foundry
That led to a minute or two of chasing the tiny Torx screw around the case after it popped out of the heat spreader and rolled around, until I fished it out with a tweezers. Framework’s screwdriver is very slightly magnetic, enough that it can barely hold the screw in place while I lowered it into the case. I was very much reminded of playing Operation while trying to line everything up.
(Framework also solders down the memory, so that you can’t install, replace, or upgrade it.)
Framework’s Desktop also includes an optional secondary slot for additional storage on the back of the motherboard, accessible via its own side panel. That panel, like the plastic panels you see here in my photos can be removed easily just by pulling them slightly out and upwards.
Framework gives you a choice between an optional translucent plastic side panel or one that matches the black aluminum used on the rest of the chassis.
Mark Hachman / Foundry
I also wasn’t totally pleased by how the top panel clips on to the case. On one try, it would clip in easily; on another, it would simply refuse to line up properly for a few minutes. Thankfully, we cut that portion from our associated YouTube video, where I’ll give you another look at what’s inside the case and how the Desktop performs overall.
Aside from a few moments of feeling like an idiot, I had no issues putting the Framework Desktop together, and I doubt you will, either. The handholding this company is willing to do should make you feel like you’re well taken care of.
The thumbscrews on the top of the Framework Desktop must be unscrewed for access to the side panels and the interior. The holes didn’t match up easily with the screw holes in the chassis, one of the few times I felt a little frustrated. Note the small but visible arrows to help you align the panels correctly.
Mark Hachman / Foundry
The other challenge to be aware of is the software drivers. If you purchase a Windows license, you’ll be asked to install it. Normally, a motherboard includes a set of pre-installed drivers or firmware to help facilitate that process; Framework’s desktop drivers had yet to be validated by AMD, which meant that I had to install a package of beta drivers alongside the Windows installation.
If for some reason those drivers aren’t available, it’s not that big of a deal. You can install Windows without needing to connect to the internet, then add the license key later. You can also do what I did, which was to discover that I had forgotten to install the Wi-Fi driver, so I simply connected an Ethernet cable instead and added the driver afterwards.
Don’t forget the tiles, which come in a variety of designs and colors.
Mark Hachman / Foundry
Everything worked perfectly, though AMD later provided an updated driver that really unlocked the processor’s performance potential. Given that Framework ships its products in batches — and those batches may take a few weeks to process — I’d expect those issues to be worked out well before you receive your finished Desktop.
Building the Framework Desktop: Looking ahead
One of the strengths of the Framework experience is that the company is looking forward to the day not when you buy a Framework device, but when you upgrade it. Though Framework hasn’t published a guide to upgrading the Desktop’s mainboard, it almost certainly eventually will. It already offers you a guide to removing the Desktop’s mainboard and installing it in another mini-ITX case, after all.
After inserting the tiles, you can slide in the I/O expansion cards, too. The gray latch on the underside of the chassis helps secure them.
Mark Hachman / Foundry
Eventually, AMD will manufacture a successor to the AMD Ryzen AI Max+ processor, and you may want to swap the existing “Strix Halo” processor out and replace it with AMD’s latest chip. And that’s the foundation of Framework’s platform: You may be able to pick and choose from future upgrades, but you’ll choose to remain within Framework’s framework.
There’s a lot to be said for that approach. We live in a world where so many companies are building in fine print and gotchas, service charges and subscriptions and labyrinthine contracts. Instead, Framework goes out of its way to be as simple and helpful as it can, and that’s something I can relate to.
I’ve reviewed many, many products over my years as a technology reporter, and I can’t think of a single one that goes to such lengths to document how to use it as much as Framework does. Framework’s Desktop gives off a vibe of “helpful nerds who enjoy explaining technology” — which is very much what I think PCWorld has always tried to achieve.
The point is that you don’t have to be a nerd to buy a Framework Desktop, however, and that’s one of its best features.
Author: Mark Hachman, Senior Editor, PCWorld
Mark has written for PCWorld for the last decade, with 30 years of experience covering technology. He has authored over 3,500 articles for PCWorld alone, covering PC microprocessors, peripherals, and Microsoft Windows, among other topics. Mark has written for publications including PC Magazine, Byte, eWEEK, Popular Science and Electronic Buyers' News, where he shared a Jesse H. Neal Award for breaking news. He recently handed over a collection of several dozen Thunderbolt docks and USB-C hubs because his office simply has no more room.
Recent stories by Mark Hachman: